So here is how the remnants of my old jeans became Dustyfeet’s very smart new waistcoat. I like waistcoats because they are incredibly easy to make, you can do just about anything with them, and Dustyfeet isn’t nearly as likely to take them off as she is a cardigan – like her dad, she objects to things with long sleeves. I will be making more waistcoats, possibly for Sandydad as well (am contemplating how I could adapt an old t-shirt or shirt, or perhaps even a charity shop denim jacket – if they had charity shops in the Middle East, that is?).
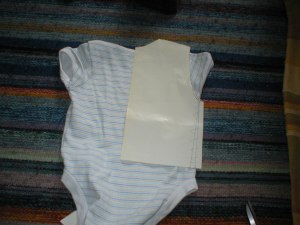
To make a waistcoat pattern, take a t-shirt or vest that fits your child. Place it on a sheet of paper with the edge of the paper lined up with the middle of the vest. Draw around the vest, omitting the sleeves.
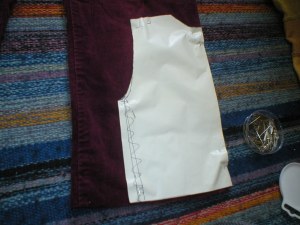
This is the pattern for the back of the waistcoat. I placed the pattern against the seam of the jeans to cut a whole back piece; this gives you a nice tidy seam straight down the middle of the back.
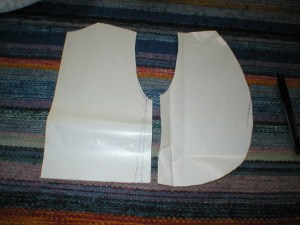
To make a pattern for the front of the waistcoat, trace around the side and shoulder of the back pattern. The shape for the centre line is for you to decide: I used a smooth curve, but you could also use straight lines. I am lazy about buttonholes so my waistcoat was an informal affair that didn’t meet in the middle, but you could overlap the two halves and add buttons if you want something smarter/warmer.
Cut two front pieces. You will also need a back and two front pieces in a lining fabric. Add any embellishments now (pockets, applique, etc.), before sewing the pieces together.
Place the outer fabric pieces right sides together and pin and sew the shoulder seams. Do the same with the lining pieces. Open out and iron seams flat.
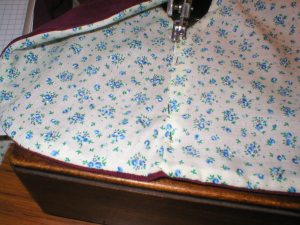
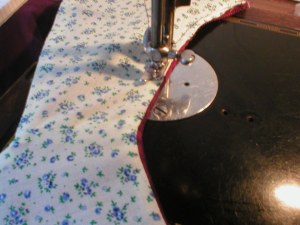
Place the outer and the lining right sides together and pin together. Sew along the bottom, armholes and around the front and neck, but DO NOT sew the side seams. Clip the curved edges, turn right side out and iron. Your waistcoat should now look like this:
Holding the lining fabric well out of the way, pin and sew the outer pieces together along the side seams, stopping exactly at the bottom and armhole seams (do not sew into the seam allowance).
Iron the seams open, then fold one edge of the lining over the other and iron flat. You can then either machine sew through all the layers, or handsew the lining together.
For a crisper finish, stitch in the ditch about 1/4″ from the edge around all the seams.
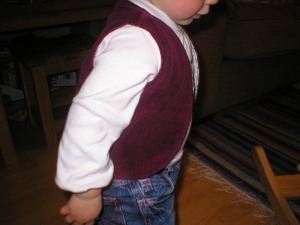
Here goes Dustyfeet in her new waistcoat:





Thank you so much for this tutorial! You really got me out of a pickle – I have spent this afternoon trying to make a waistcoat for my son to dress up as Frodo Baggins for World Book Day in a couple of weeks time. Anyway, I managed to get myself in a right old mess as I couldnt figure out how to get it all sewn together (ended up with a complete waistcoat, but inside out and no way of tutning it! Lol). A quick google later, and I found your tutorial – a bit of unpicking, and a bit more stitching, and I now have a passable waistcoat for my little hobbit! It’s not perfect, but it’s not bad for a fancy dress costume!
Thanks for this. Made 2 waist coats in a few hours and i cant even sew!
Thanks for such clear instructions. I had a lovely remnant of fine needlecord in bright colours with big eyed owls, and a soft checked flannel. They have fitted together well. I wa a little worried about the underarm seam, but it went fine. The only thing i was really unsure about, was when to sew the bottom seam. I did this when i was doing the top stitching at the end and that seemed ok. I’ve made this for my 18 month old grandson. Fingers crossed it fits!
This has helped me so much, and I wasn’t even making a baby sized one! Brilliant instructions, I wish I’d found this before I made my last one as my tutor completely screwed me over.
Fantastic – Thank you!!
This pattern is brilliant – thank you so much – have just made my daughters outfit for the school play using this waistcoat pattern and she is over the moon with it.
I think this is the one for me,thank you.
Thank you, Ian up cycling some leather from an old sofa and was wondering what I could make? My four year old grand daugher will be delighted when she sees what I’ve made her she is a kool dood. Thanks for making it so simple. Xx
Brilliant tutorial, thank you. Added patch pockets on the inside and out, also buttons. Fantastic reversible little waistcoat for my son as Willy Wonka for World Book Day.